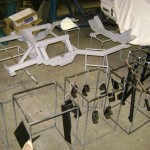
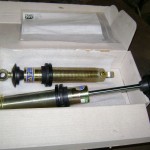
On arrival Friday afternoon I was greeted with a bunch of parts that my father primed since my last visit. I cannot wait for the color coat to be applied to them, but for that I will have to wait for the end of the month when there is time and the weather is looking better. I to had some time on my hands to source a few parts, managed to buy the new rubbers for the car, still a few outstanding as the suppliers are waiting on stock, almost the same story regarding the seats, our country is out of stock on Sabelt Racer seats, I managed to get one, well better than nothing, at least we can continue with the roll cage and seat mountings with the single unit. During the previous week I received a very surprised but welcome email from the agents of GAZ shocks, they notified me that my shocks arrived a month and a half early, I arranged a courier and was able to get them before the weekend. I must say the adjustability on these units ( Gaz Adjustable 2″ Diameter bodies with 14mm Rods and Spherical Bearings – 200/125R14 ) will help allot when it comes to setup.
Saturday morning started with a few changes to the cross member and rear diff cage for future improvements, not even sprayed color yet and the changes already started. Well we made provision for some additional mounting brackets and holes for mounting pipes, brackets, etc.
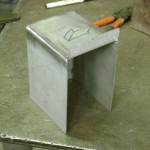
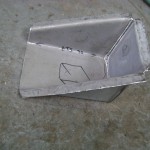
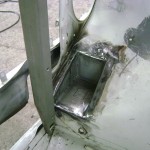
Next was the Oil Cooler, previously during planning the mounting of the unit, we decided to get a box bend that we would weld into the wheel arch to provide the necessary clearance for the oil cooler without additional modifications to the cooler. We had everything ready and started with cutting the hole for the box, welded the basic box together. After some final trimming of the hole we got to the desired size and manufactured the box to the correct size with bend tabs for welding it into place. After the TIG welder was switched of I took a grinder to it and finished it off with a flapper wheel for a nice smooth surface. We started with the mounting brackets one by one to ensure a 100% correct fit as we wanted it.
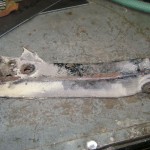
Next on the list was the front lower control arms, from our calculations, they had to be extended at least 40mm, we also decided to make them adjustable to gather for ease of setup, we decided on rod ends for the adjustable part. We sourced some solid square bar and had our machine shop machine them to size which will fit the inner diameter of the control arms. After cutting the front part of the arms off, I proceeded in removing the old support plates on them, the control arms was treated with 2 coats of anti rust paint and the new support plates welded on. I’m quite confident that these units will be able to handle the added strain of running slicks and semi slicks with ease, the rose ends will also enable me to adjust a decent amount of camber and due to their amount of movement, a large amount of caster can be adjusted via the track rods. I just hope these rod ends is as strong as the price, these units does not come cheap.
The rest of the evening was used to tread some of the smoothed out surfaces with primer, anti rust paint and the last of the seams on the rear interior was treated with polyurethane sealer.
Sunday morning started off where I left off the previous night, all the seams on the rear exterior was sealed up with sealer, also a few seams and spots that a missed previously. The box for the oil cooler was also done during this time. I’m so glad the majority of sealing work is done, I do believe sanding the body will be nicer than sealing. Hopefully on the next visit I’m able to lend a MIG welder and weld the roll cage mounting plates in place and spray the underside with Stonechip.
More Pictures – 30 October 2010 – Oil Cooler & Front Control Arms
Return to Datsun 1200
